
With all the sophisticated features that can be found on the latest iPhone cameras—such as a dual camera that essentially acts like a telephoto lens, a wider aperture lens that allows more light for low-light photos, optical image stabilization, a brighter flash, quick refocusing, and the ability to capture a wider spectrum of colors—you don’t have to be an experienced photographer to take high-quality photos. However, you might be surprised at how even a little extra effort on your part can help to take your photos from good to great. Read on for a list of tips you can try to make the most of your iPhone camera’s awesome features.
Quickly access the camera.
This frustrating experience will be familiar to any photographer: an amazing moment unfolds in front of your eyes, but by the time you’ve got your camera ready to go, the moment has passed and your perfect photo opportunity is gone. If you want to be able to capture those fleeting moments, you need speed on your side. Fortunately, the iPhone has a shortcut so that you can open the camera and start snapping with no significant wait time. If your iPhone is locked, simply swipe up from the camera icon on the bottom right of your screen. The camera will open up instantly without the need to enter your passcode. If you’re already using your iPhone, swipe up from the bottom of the screen to open the Control Center, then quickly tap the camera icon.
Snap with the volume button.
When you’re taking a picture with your iPhone, any slight movement of your hands or arms can cause the picture to become blurry, and unfortunately, it’s difficult to press the digital shutter button on your iPhone’s screen without some degree of shakiness. To maximize stability, you should skip the digital button and instead press down on the volume button to take your shot.
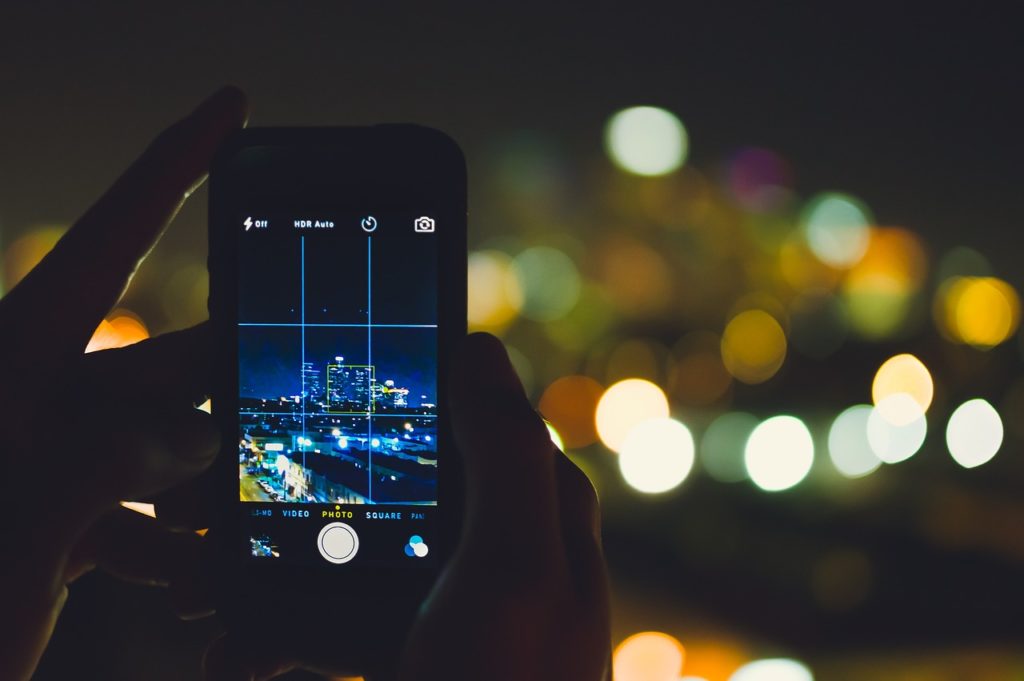
Use the grid.
One of the most useful photography tools on the iPhone camera is also one of the simplest. The grid uses two horizontal and two vertical lines to divide your screen into nine equal parts. When you have the grid feature turned on, these lines will overlay the image on your screen and will help you find the best possible composition for your photo. As a general rule of thumb, placing your subject at the intersection of two grid lines is the way to go: known as the “rule of thirds,” this composition principle is one of the fundamental keys to great photography. The horizontal grid lines can also help you to ensure that the horizon is level whenever you’re taking a landscape photo.
Try burst mode.
If you’re trying to photograph a scene with lots of movement or an unpredictable subject, like a child or an animal, it’s a good idea to give burst mode a try. This useful shooting feature lets you take 10 photos in just one second, greatly boosting your chances of capturing the perfect action shot. To activate burst mode, hold down the shutter button for a moment, and your iPhone will automatically start snapping a quick sequence of photos. You’re then free to review the sequence, choose the best photos, and delete the rest.

Set and/or lock your focus.
While your iPhone will automatically set the focus of your photo for you, there are times when you might want to do this manually. For example, you might be trying to take a photo in which you want the subject in the foreground to be blurred and a detail in the background to be in focus for artistic effect. Fortunately, manually setting the focus couldn’t be easier. All you need to do is tap the point on the screen where you want to set the focus, and the camera will automatically readjust. In addition, if you want to lock your focus—as you might do if you’re photographing a moving subject—tap the point on the screen where you want to set the focus and hold it for a few moments. You should see the yellow “AE/AF LOCK” box appear at the top of your screen.
Experiment with HDR photos.
For photos of high-contrast scenes where there are very bright and very dark areas, you can get better detail in the shadows and the highlights using HDR mode, which stands for High Dynamic Range. HDR is an iPhone photography tool that creates one properly exposed, balanced image by merging three different exposures of the same photo. This is a great way to boost the vividness of the color, avoid overexposure of bright areas, and enhance detail in darker areas. The HDR setting is located on the left side of the camera app. Tapping the button will let you choose from Auto, On, or Off. Photographers particularly like HDR when taking photos of scenes where the sky covers a large part of the image.